Pictures of What Lice Eggs (Nits) Look Like in Hair:
9 Tips to Spot Them
Question:
What do lice eggs and nits look like?
Answer from a Lice Expert:
As a lice professional, I use 9 simple tricks to spot and identify lice eggs (also known as “nits”) within seconds. This article is loaded with pictures and videos, so you'll be able to spot nits in no time.
A quick note: If you are new to lice, nits and lice eggs are the same thing. The two words will be used interchangeably throughout this article.
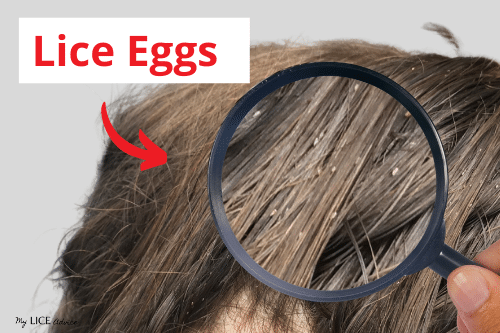
9 Ways to Identify Lice Eggs (Nits)
You Will Usually Find Several Lice Eggs, Not Just One
Look at the pictures in this article to see how many lice eggs are typically in the hair.
When in Doubt, Try to Pull it Out--Nits are Stuck!
Watch the videos below to see what I mean.
Lice Eggs are Most Often Found in the “Hot Spots”
What are hot spots? Look at the pictures below to see what areas of the head lice eggs are most often laid.
Check Close to the Scalp for Nits
See how close lice eggs are laid to the scalp in the pictures below.
Take a Closer Look on a WHITE Paper Towel
View nits/lice eggs on a white paper towel in the pictures below.
Lice Eggs Have Color to Them
View lice egg typical colors in the pictures below.
Lice Eggs Have a "Tail"
Take a look at what a typical lice egg "tail" looks like in the pictures below.
Nits Are Located on the Side of the Hair Strand
Look at what I mean in these pictures below.
Lice Eggs’ Shape And Size Remain the Same
Look at the typical size and shape of lice eggs in the pictures below.
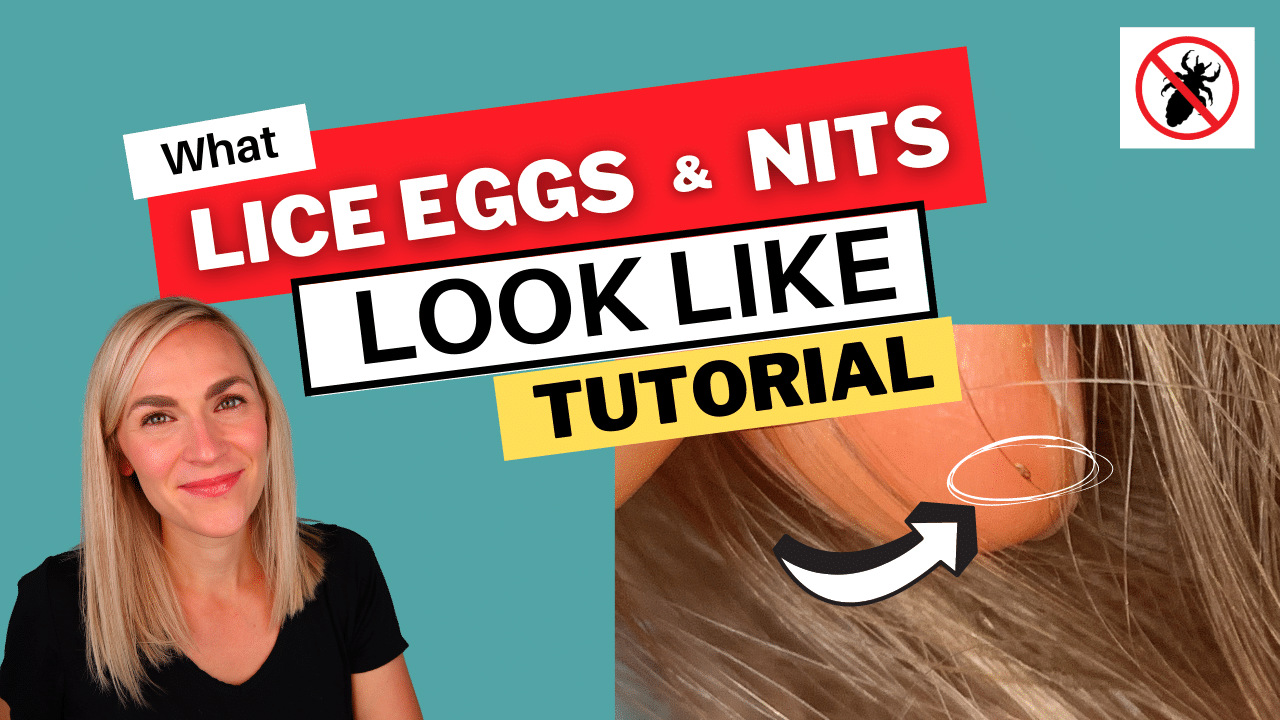
What Lice Eggs and Nits Look Like Video Tutorial
Let me introduce myself...
Hi there! I'm Theresa, I'm a lice expert, lice coach, and Registered Nurse. I help people with lice every day! You can get rid of lice in ONE DAY at home by using the same proven professional technique that I use in my lice center.
Just follow the step-by-step videos and be done with lice by the end of the day.
How to Spot Lice Eggs (Nits)
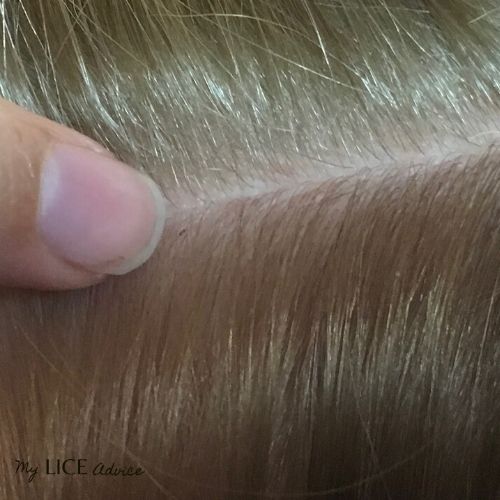
One of the most misunderstood things about lice is what lice eggs and nits look like. With misinformation flooding the internet about lice eggs, it’s easy to understand why folks are confused.
As a lice professional, I use nine simple tricks to spot and identify lice eggs (also known as “nits”) within seconds.
Whether you’re checking your child for lice or full-on “nitpicking,” here are my tips for identifying lice eggs quickly.
A quick note: If you are new to lice, nits and lice eggs are the same thing. The two words will be used interchangeably throughout this article.
Tip #1: You Will Usually Find Several Lice Eggs, Not Just One

Female adult lice lay around six to ten eggs per day. That means that in just one week, each bug can lay up to seventy eggs!
Luckily, not every lice bug lays eggs (only adult females), but still, that’s a lot of eggs in a short time.
If you find something in the hair that you think might be a nit, don’t stop looking after finding just one. Keep searching because the chance of finding just one nit in the hair is rare. If you start finding a lot of the same things, begin pulling them out so you can examine them more closely, using these tips.
Tip #2: When in Doubt, Try to Pull It Out
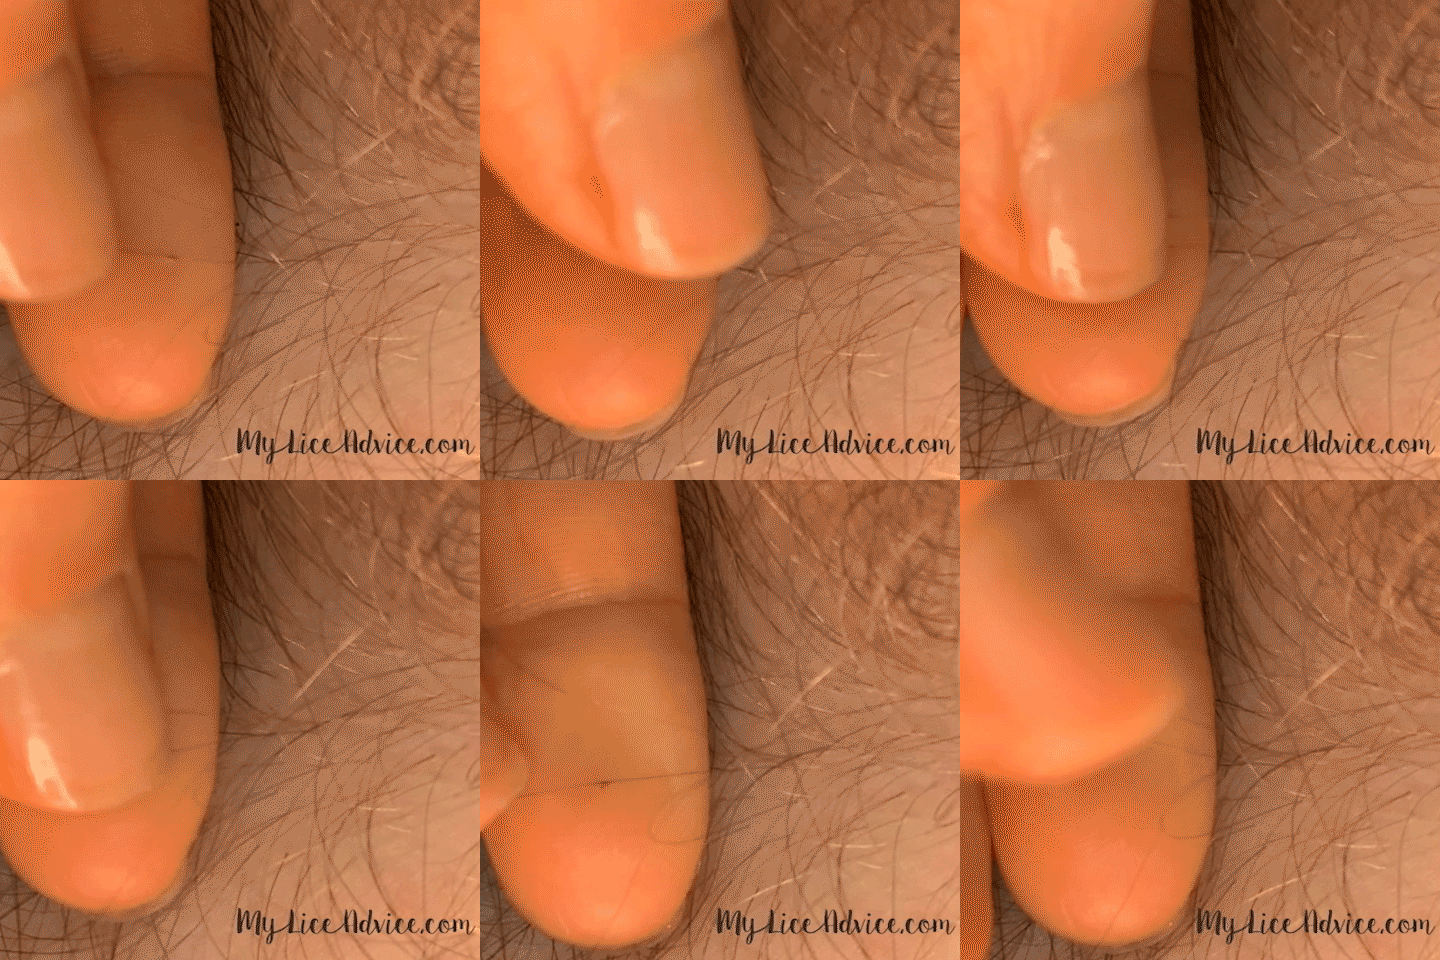
When determining whether you are finding nits in your child’s hair, use the motto “When in doubt, try to pull it out.” Nits are difficult to pull out because nits are glued to the hair. Lice create a powerful glue with their saliva to attach lice eggs to hair, so a nit has no chance of falling off a hair strand.
Nits cannot be washed, brushed, or soaked out of the hair. The only way to remove a lice egg from a hair strand, other than a high quality lice comb, is by performing a tedious manual removal process known as nitpicking.
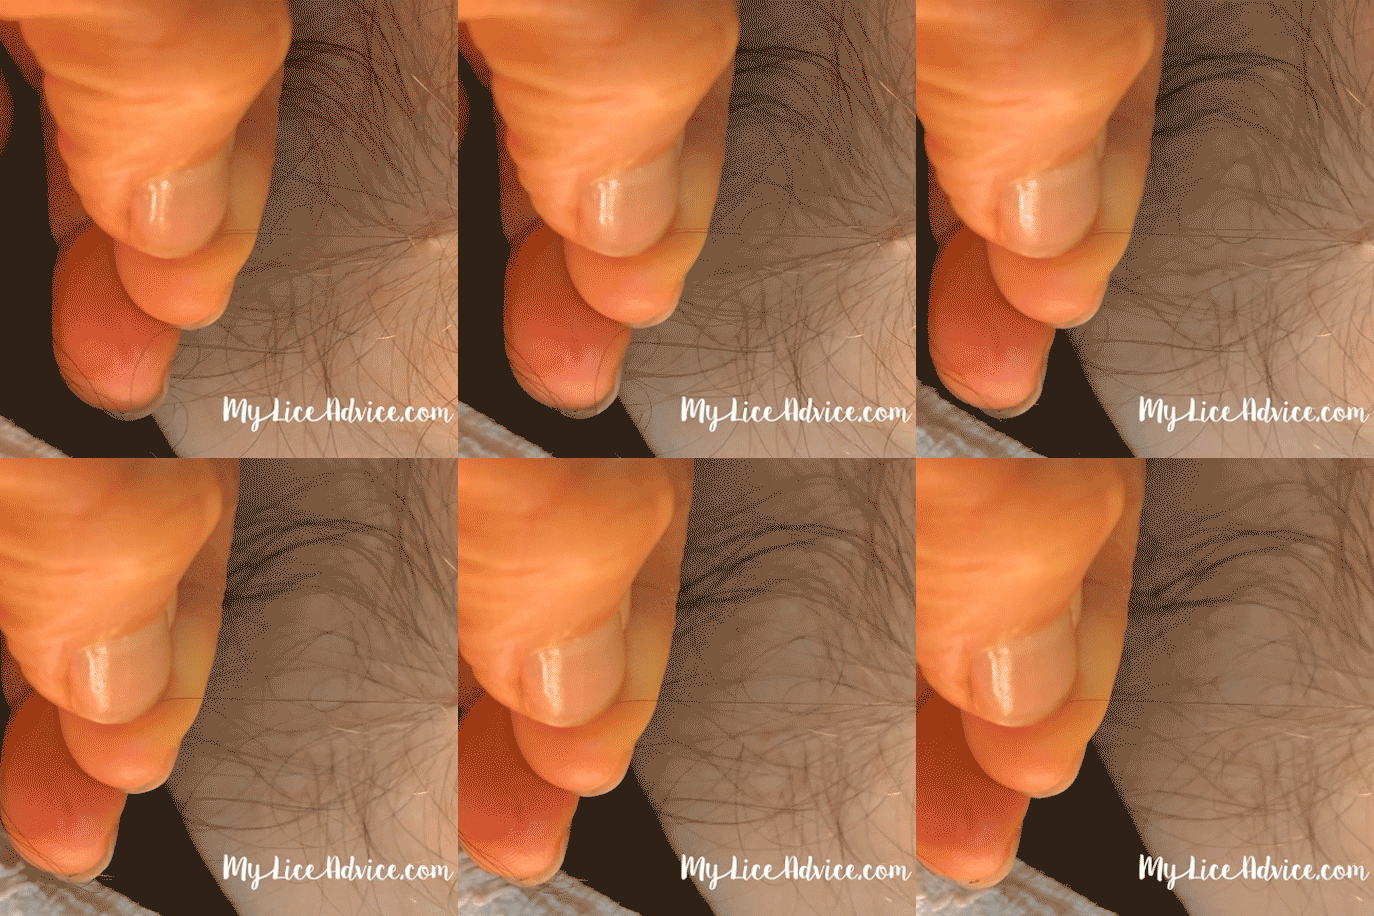
To remove a lice egg, you must squeeze it between two fingers or nails and pull the nit down the entire hair strand. If you find several things in the hair that are “glued” and they can only be removed in this manner, then you are likely dealing with lice.
Tip #3: Lice Eggs are Most Often Found in the “Hot Spots”
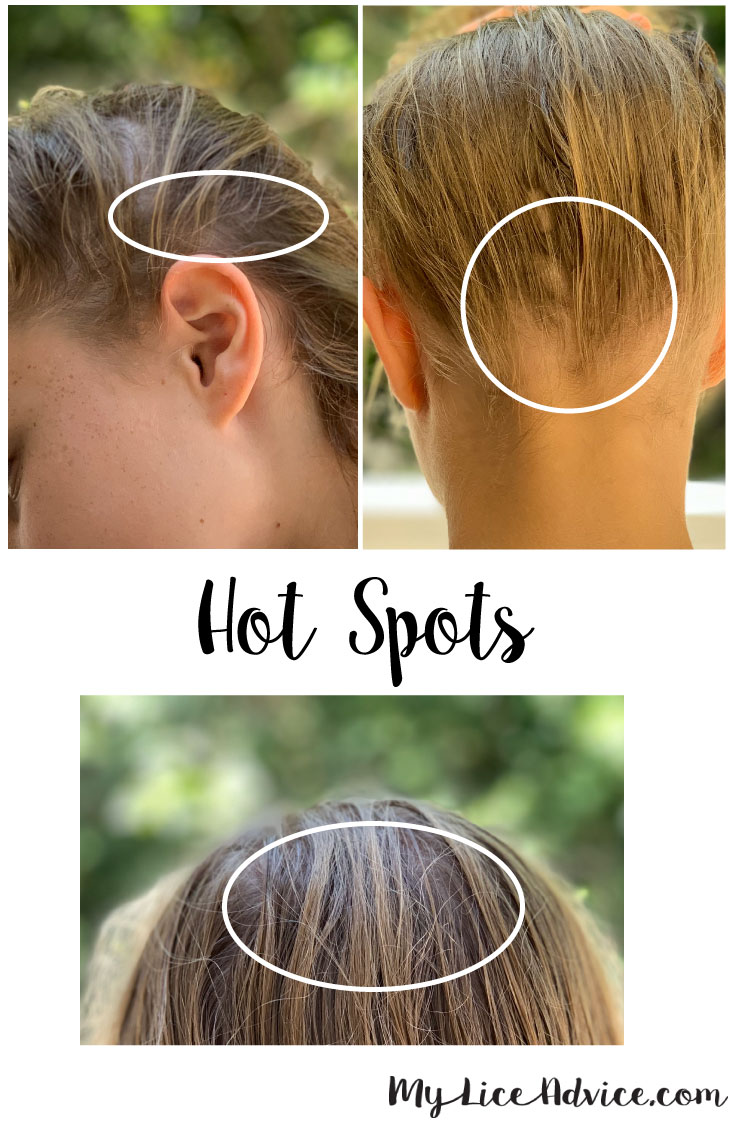
There are a few places on the head that lice absolutely love to lay their eggs. These places are called the “hot spots” of the head, and you will find a more significant amount of nits in these places. Common hot spots are behind both ears, at the nape of the neck, and on the crown of the head. These hot spots are the places you should most closely examine for nits. If you find several nits in these areas, you are likely dealing with lice.
For a detailed tutorial of how to check for lice read How to Check for Lice: Checking for Lice in 5 Easy Steps.
Tip #4: Check Close to the Scalp for Nits

Nits are laid and glued within ¼ inch (6mm) of the scalp. Once fixed to the hair, a nit does not move or slip down the hair strand. You should look for nits close to the scalp, rather than at the end of the hair. If you find nits further down the hair, more than 1⁄4 inch (6mm) away from the scalp, it means one of two things:
1) these are not nits (this is fortunately the most common explanation--phew!) or
2) the nits have been in place long enough that the hair has grown out.
For people who have struggled with lice for years, it is common to find nits up and down the entire hair strand. Although those nits were initially laid within ¼ inch (6mm) of the scalp, as the hair has grown over time, the nits have remained glued to the same place on the hair while the hair has grown. The picture here is of someone who had lice for three years.
Tip #5: Take a Closer Look on a WHITE Paper Towel
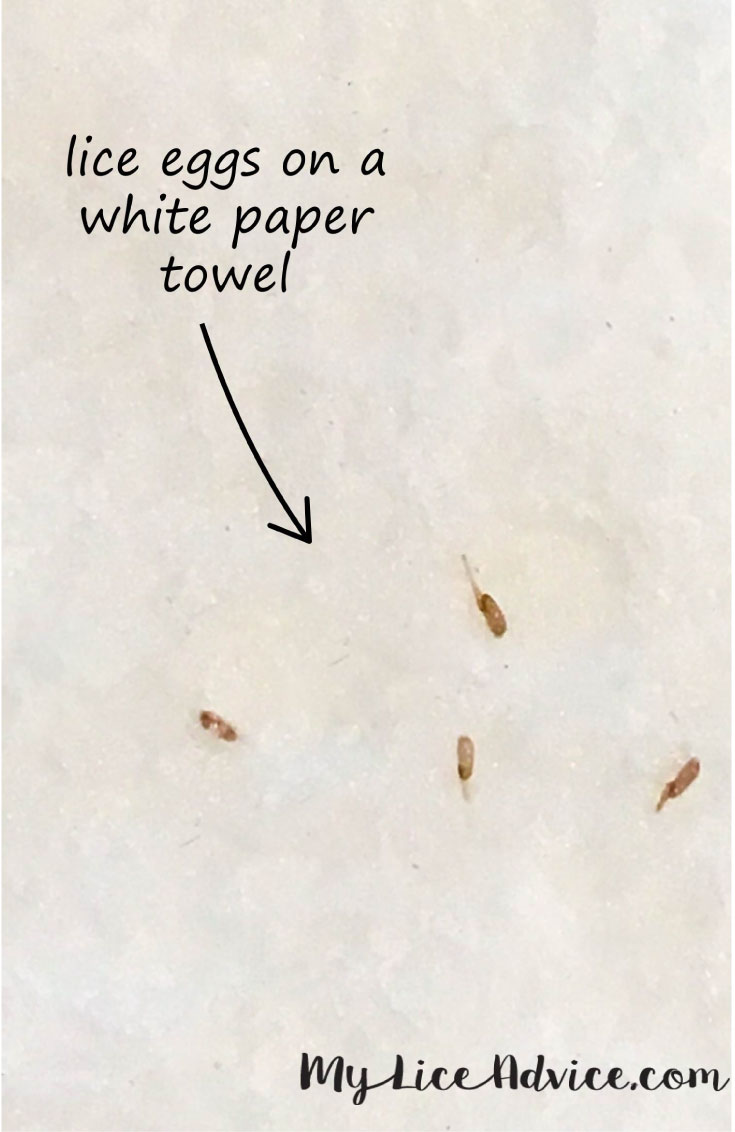
After pulling out the potential nit, place it on a WHITE paper towel for further examination. A simple stack of WHITE paper towels is the very best place to examine a nit. The color of the paper towel is very important--do not place nits on something black or otherwise colored. Although nits can look white in hair, once they are pulled out of the hair and set on a white paper towel, you will find that they are actually amber, golden, or brown.
Tip #6: Lice Eggs Have Color to Them
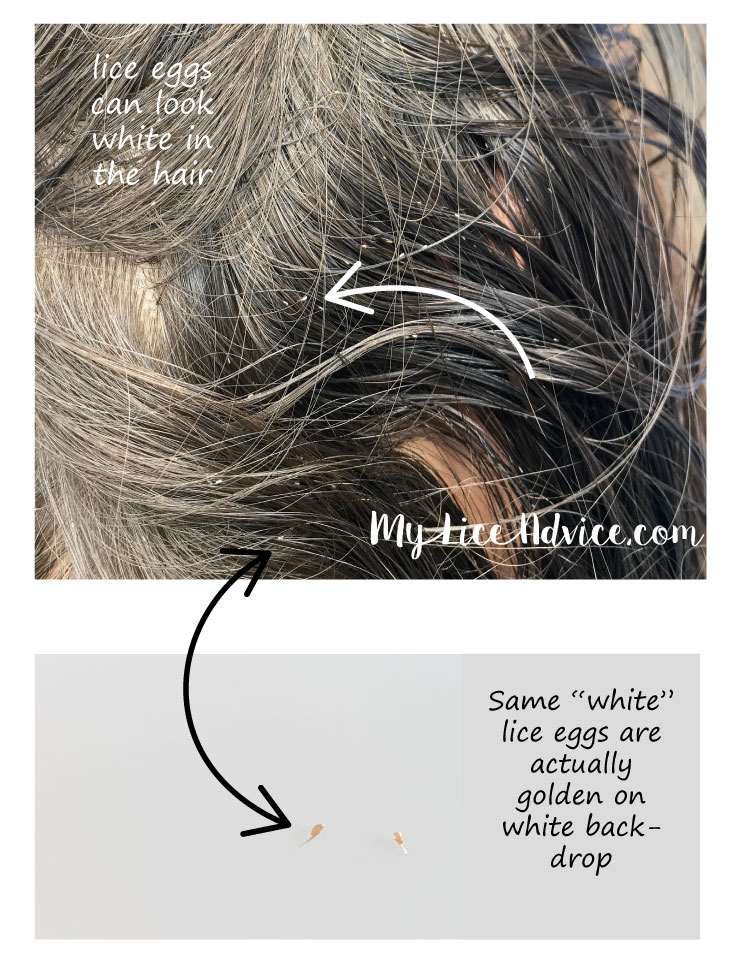
As we just discussed, a common misunderstanding is that nits are white. Nits have a shiny appearance and can appear white, especially in dark hair, but if removed and placed on a white paper towel, they will be golden, light brown, dark brown or even transparent. Nits are colored differently depending on your own hair color, and whether the nits are hatched or unhatched.
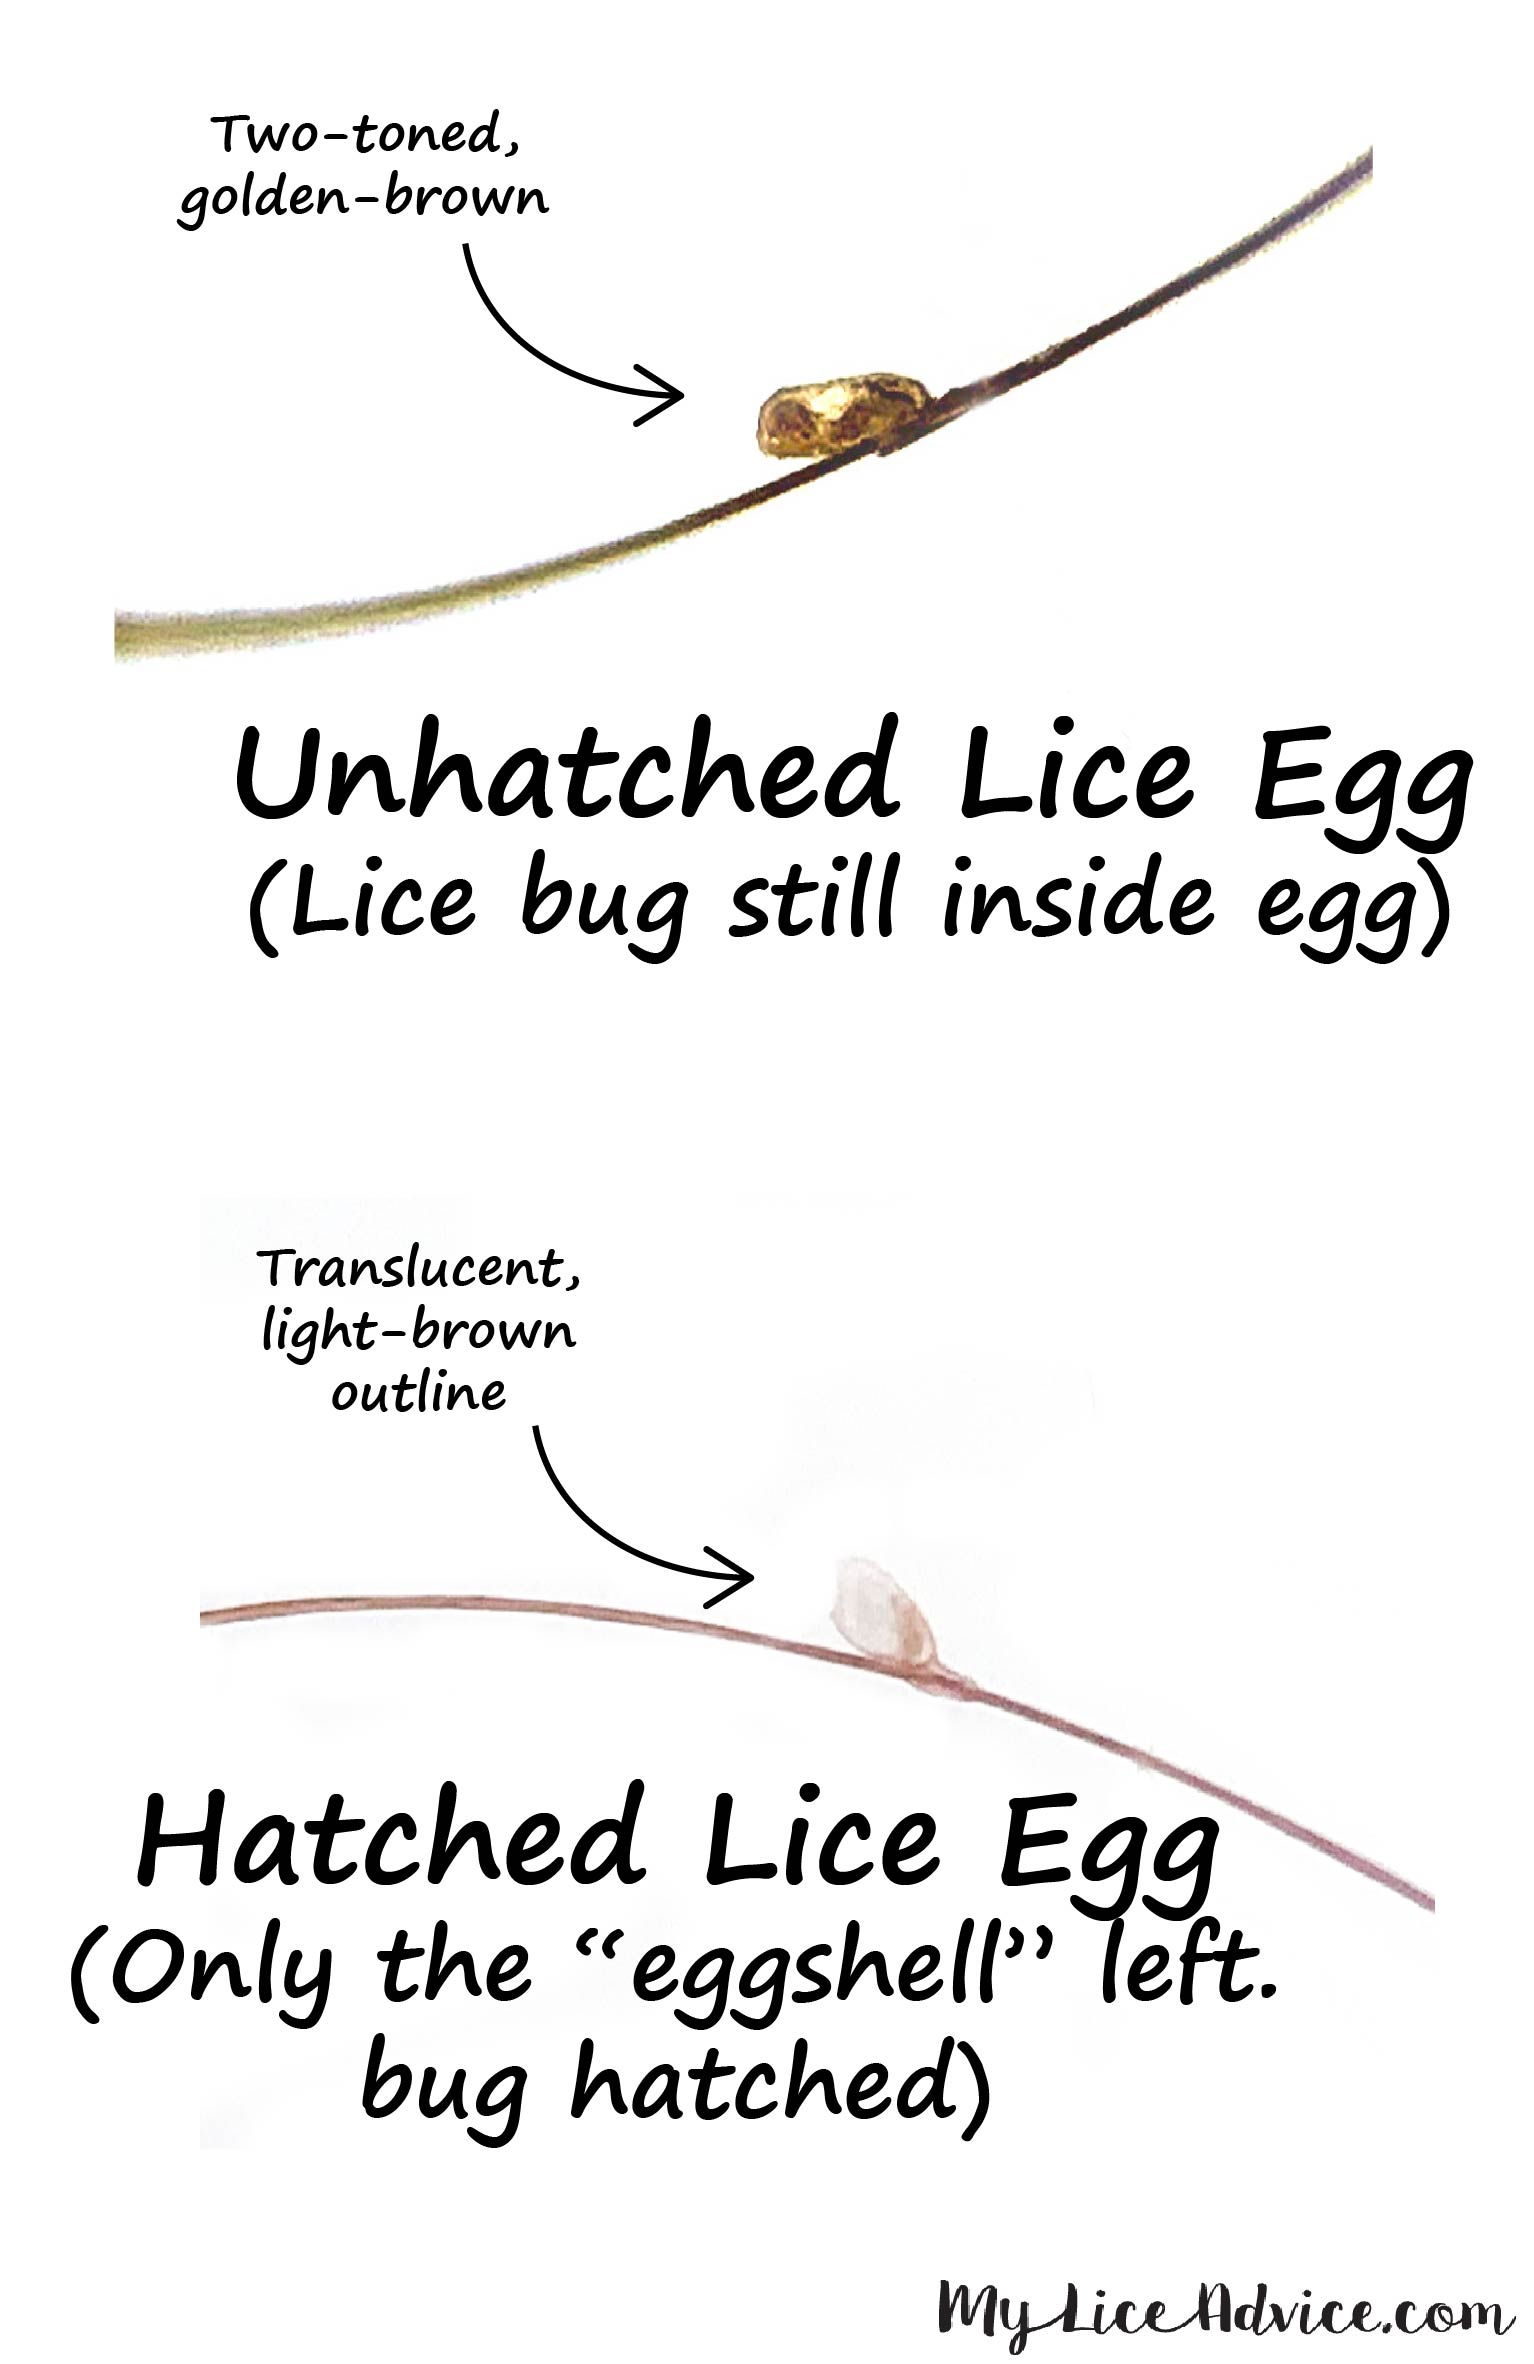
If you place a nit on a white paper towel and take a closer look, you will see that many nits are two-toned--often a golden brown with a dark brown circle inside. When lice initially lay nits on the hair strand, they typically have this coloration.
The dark circle is the small lice bug growing inside the egg. Over the next few days, that lice bug grows inside the egg. As it matures, the nit will appear darker and darker until it seems completely brown.
After the lice bug hatches out of the egg, the eggshell remains on the hair strand. Lice eggs left over after the bug has hatched will appear to be white or translucent because all you see left over is a shell or casing with no bug inside.
Similar to a chicken egg, after you crack open the egg and remove the insides, all you have left is a white shell. Take a look at the close up picture of an old translucent lice eggshell. After the bug has left the egg, the top part of the eggshell is broken open, and you see only the shell.
Tip #7: Lice Eggs (Nits) Have A Tail
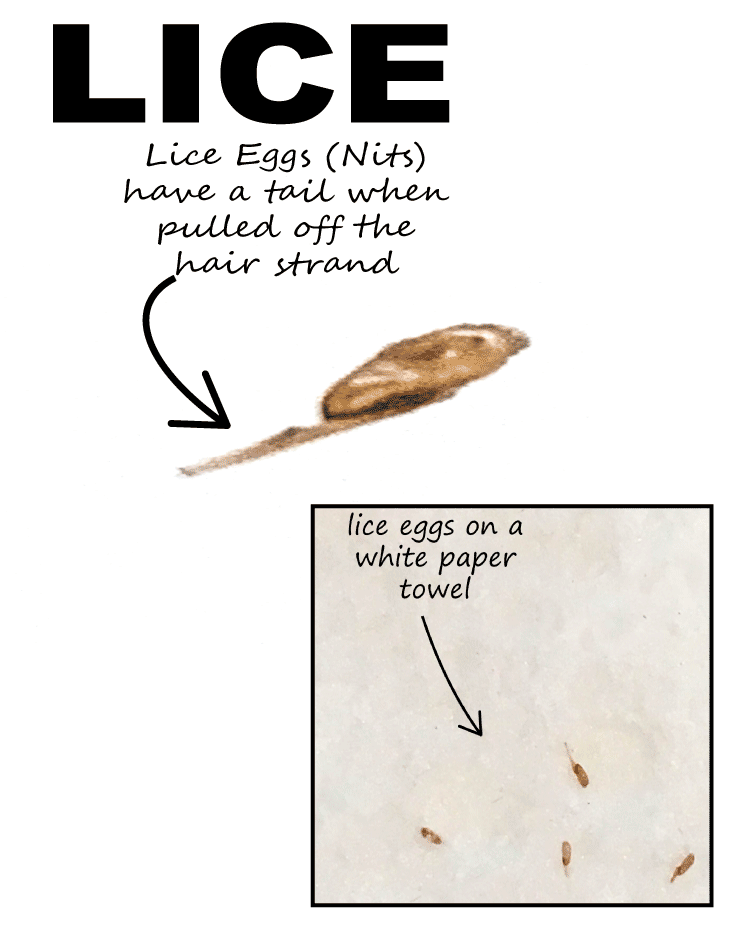
Because of the strong glue lice use to lay their eggs, when pulled out, nits look like they have a "tail". It is impossible to remove a nit from the hair without the glue coming off with it. The glue is what gives the impression that the nit has a tail. You will always find this tail if you’re dealing with lice eggs.
Tip #8: Nits Are Located on the Side of the Hair Strand
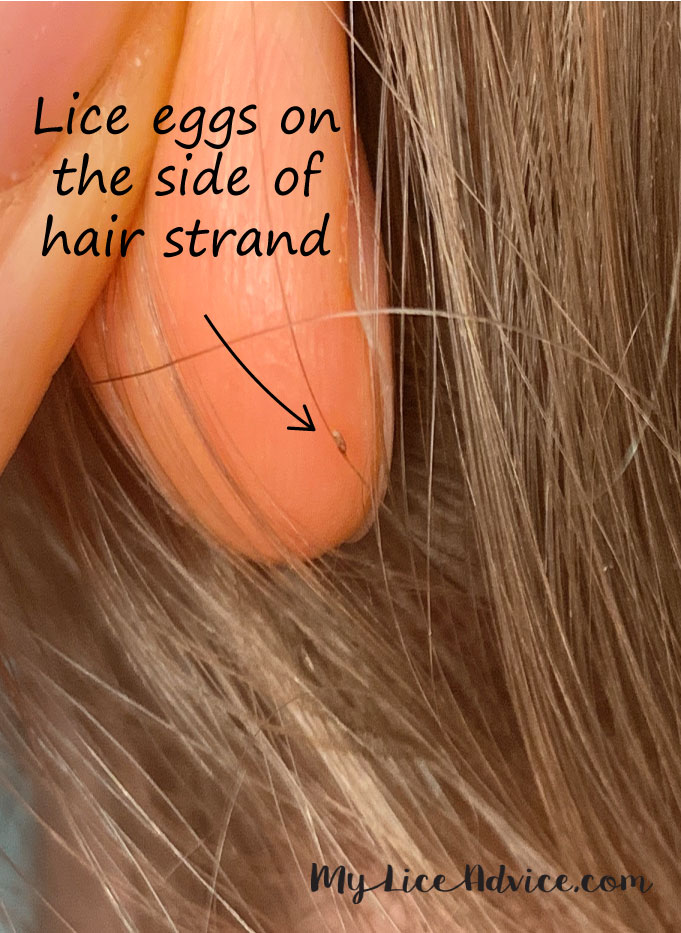
Lice lay nits on the side of the hair strand, as opposed to wrapping around the hair. The analogy that best describes nit location on a hair strand is a flower with a long stem and a single leaf growing from the stem.
The hair strand is the stem of the flower, and a nit is the leaf on the side of that stem; it does not wrap around the hair strand. If you are finding something that wraps around the hair strand, it is not a nit. It is likely something else, like leftover food or a scalp condition such as DEC plugs or hair casts. If you’re still uncertain, check out my article, Lice vs Dandruff - 7 Differences Between Lice Eggs and Dandruff, which details the differences between lice eggs, dandruff, and even DEC plugs.
Tip #9: Lice Eggs’ Shape And Size Remain the Same
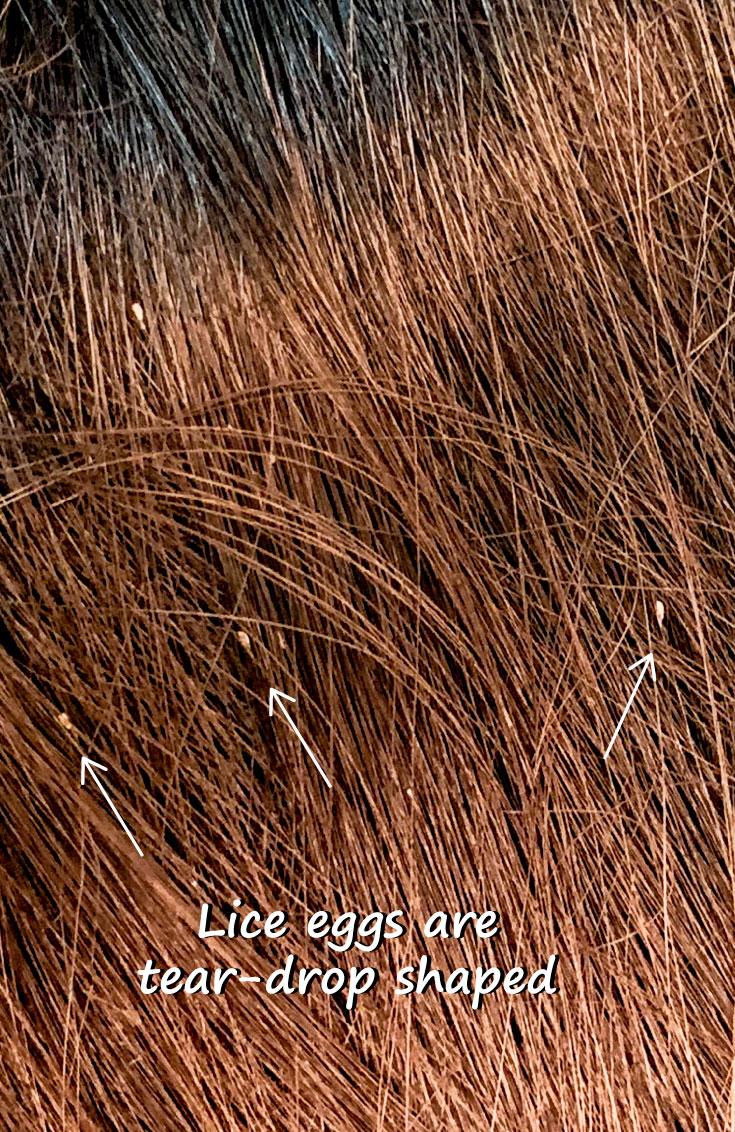
While you will find nits in a variety of colors, the shape of a nit is always the same.
Nits are teardrop-shaped, not circular.
If you find something in the hair that is circular or irregularly shaped, it is not a nit. Most likely, this is a form of dandruff often confused with lice. Remember, if you’re looking for more clarity on lice compared to dandruff, please check out our article, Lice vs Dandruff - 7 Differences Between Lice Eggs and Dandruff, where we discuss in depth the comparisons between lice and scalp conditions.
Just as nits are all the same shape, they are also all about the same size. Lice eggs are tiny, about the size of a small knot in a thread. If you see a variety of different sizes of what you think are nits, some small and some large, these are more likely a type of dandruff.
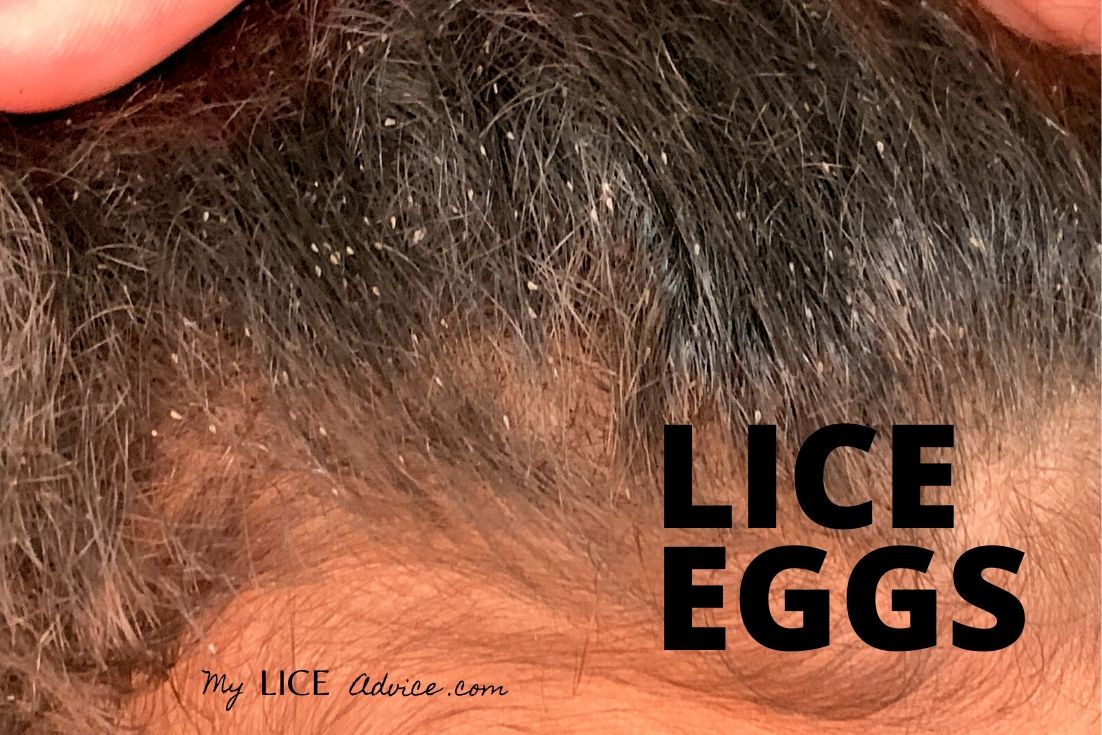
What Lice Eggs Look Like:
And a picture is worth a thousand words, so here's another picture.
Why Is It So Hard to Get Rid of Lice?
Now that you know what you're looking for I want to talk briefly about your biggest worry (that your child actually has lice) and the question I get asked by parents around the world that have been battling lice….
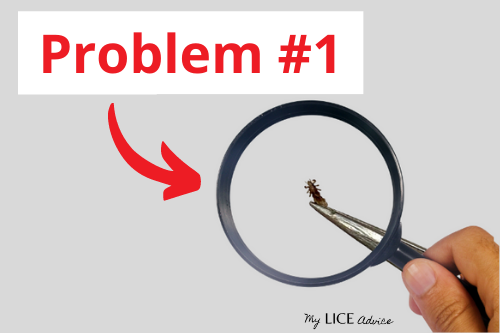
Parents around the world are all asking me the same question…. "Why is it so much harder to get rid of lice now?"
Lice have become immune to everything that used to work in the past. Perhaps you remember your mom using a typical lice treatment or mayonnaise and that doing the trick. The new strain of head lice is no longer killed by those treatments, that’s why lice today are termed by people, “super lice,” because they are immune to those treatments.
I’ve cured thousands of people of lice in my lice center and let me tell you, I don't do it with over-the-counter lice treatments.
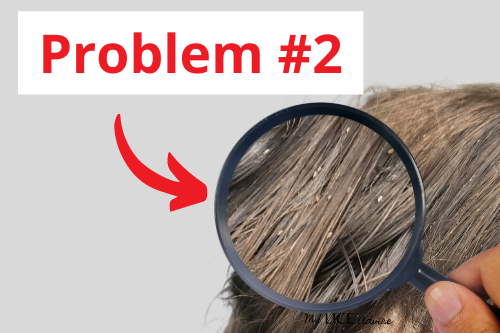
Most people struggle with lice because they focus all of their attention on killing lice bugs and not enough attention on GETTING RID OF LICE!
If you want to get rid of lice you have to address all 3 of the problems of lice:
- Lice Bugs
- Lice Eggs
- Getting Lice Back
The best way to get rid of lice is to tackle all 3 of these problems at the same time, which is what I teach in my step-by-step video system.
So, if you discover your child HAS lice, don't panic. Just head over to the video system. Follow along with the videos and you'll be done with lice by the end of the day.

So You Have Lice… What Now?
Using these nine tips, you will be able to spot lice eggs like a pro. If you are in fact finding nits in your or your kid’s hair, then you’re unfortunately dealing with a lice infestation. But, don't stress, I'm here to help. I help parents like you every day!
Go to the step-by-step video system, follow along with the videos and be done with lice by the end of the day!
If you’re still not sure if what you’re seeing are actually nits, make sure to check out our article Lice vs Dandruff - 7 Key Differences Between Lice Eggs and Dandruff. This article shows side by side pictures of lice and dandruff and explains how you can easily tell the difference between the two. It also has pictures of lice eggs in hair and will give you more knowledge of what lice eggs and nits really look like.
All the best,


Theresa is a Registered Nurse and lice expert with years of experience curing children of lice. She owns a lice treatment center in the US which is where she perfected the Step-by-Step Video System proven to get rid of lice. She also works with government agencies and schools helping those with the worst head lice cases in America.
Her greatest passion is empowering parents by teaching parents online how to do a professional lice treatment on their child at home. She is the Lice Coach for the My Lice Advice Step-by-Step Video System.

