How to Check Your Child’s Head for Lice:
Simple Steps with Pictures
Question:
How do I check my child for lice?
Answer From the Lice Expert:
There are 5 simple steps for checking for lice. Check out the video tutorial below and follow along or learn the 5 steps with the pictures and article below.
How to Check Your Child's Hair for Lice in 5 Easy Steps
Know What to Look For
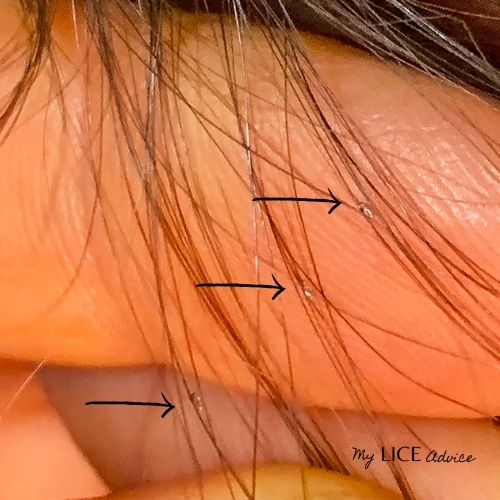
Check out these pictures below of lice bugs and lice eggs.
Pick a Place with Good Lighting
Learn more about the best lighting below.
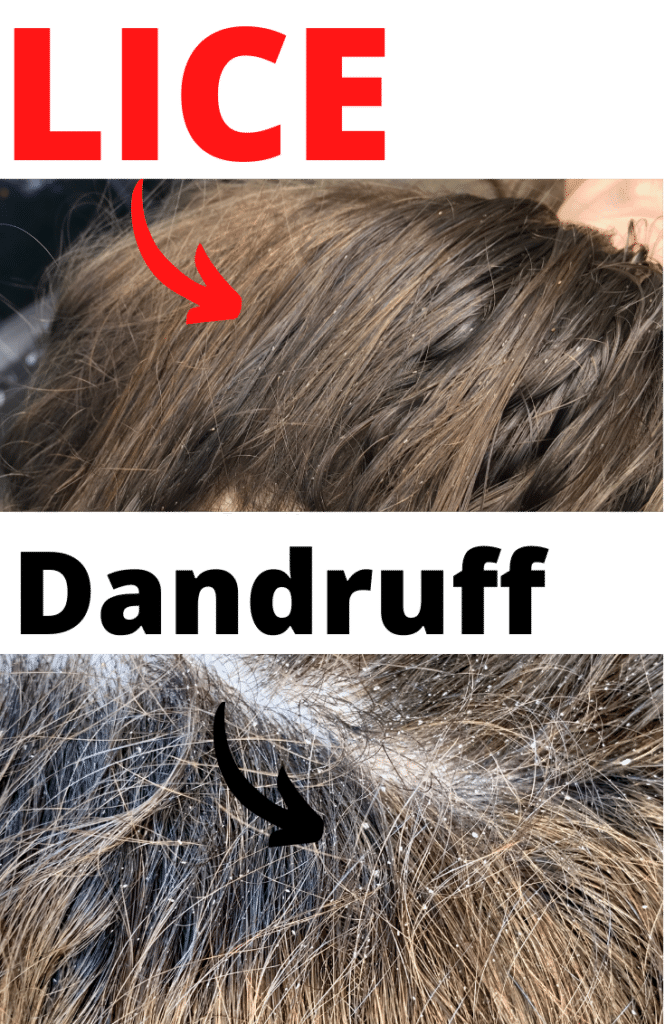
Don't Get Confused By Dandruff (Start with DRY HAIR)
Compare the difference between lice eggs and dandruff in the videos below.
Check the "Hot Spots"
Learn the 4 hot spots with the pictures below.
TOOLS YOU WILL NEED
- Good lighting (read below)
- Dry hair
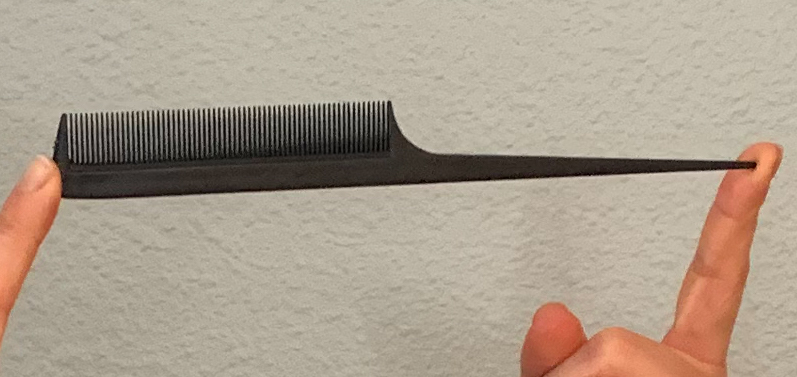
- Fine toothed comb (I prefer a rat-tailed comb like the one pictured here.)
- White paper towels
- Hair clips or hair ties
Let me introduce myself...
Hi there! I'm a lice expert, lice coach, Registered Nurse, and the creator of My Lice Advice. I help people with lice every day in my lice treatment center, in school districts, and in government work. But the thing I love the most is empowering parents to get rid of head lice in ONE DAY at home!
You can eliminate lice in one day using the same proven professional technique I use in my lice center on your child. Follow along with the Step-by-Step Video System, and when you're done with the videos you're done with lice.
Step #1- Know What to Look For
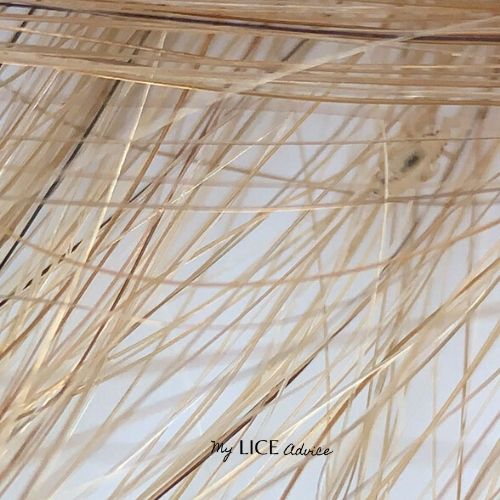
Many people mistakenly believe that if their child has lice, they will see bugs crawling around in the kid’s hair. In most cases, though, this is simply not true. Lice are actually tiny experts at blending in with hair.
For instance, can you spot the lice bug in this picture?
Looking for Lice Eggs
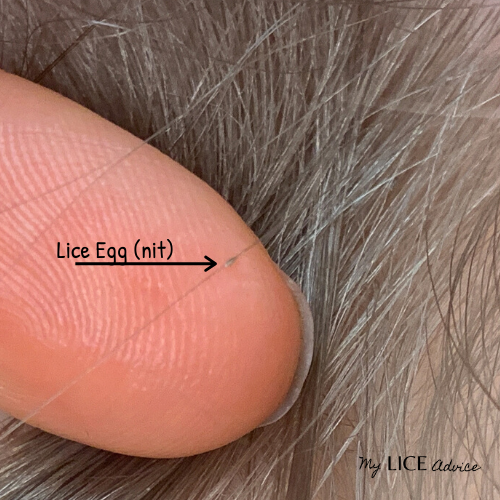
Because lice are so good at hiding and moving quickly, it is pretty rare to see lice bugs early on in an infestation. Instead of looking for fully grown lice bugs, you should focus on finding lice eggs (also called “nits”) in the hair. Unlike adult lice bugs, nits do not move around or hide. These eggs are glued onto the hair strand so they will not fall off. This makes finding lice eggs much easier than finding grown lice. Because nits in your child’s hair is the first sign of a lice infestation, finding them at this stage can help you eliminate lice when there are only a few adult lice bugs. To help out, this tutorial is full of pictures to show you exactly how to check for these lice eggs.
A quick note: If you are new to lice, nits and lice eggs are the same thing. The two phrases will be used interchangeably throughout this article.
Before we get into where to check on your child’s head, let’s briefly talk about how to determine whether what you find is a nit or something else entirely.
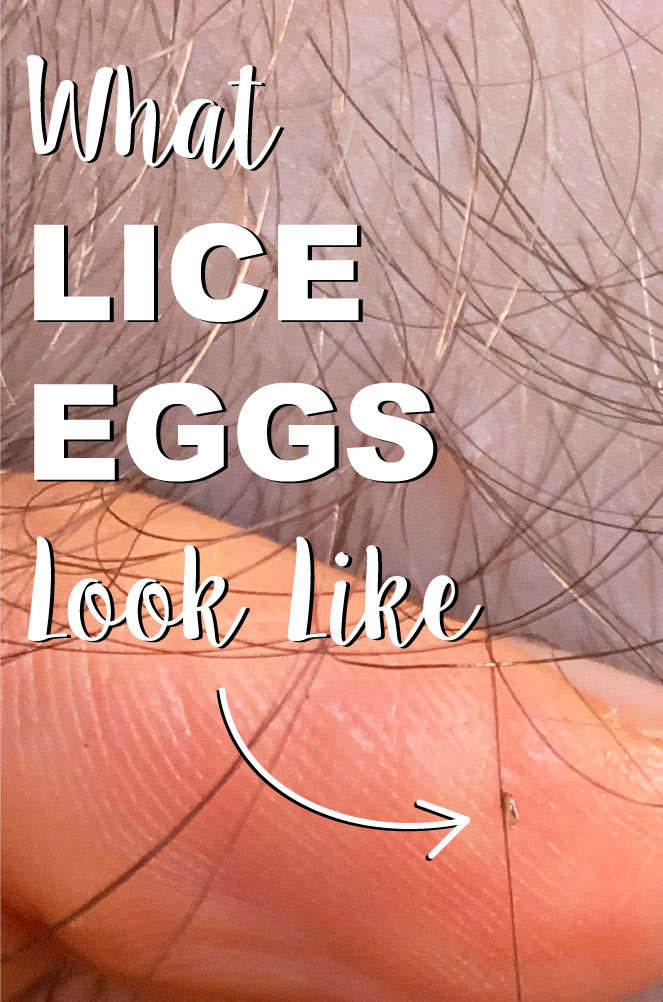
To begin, lice eggs are stuck on the hair strand. It is impossible to brush, flick, or blow them out of the hair. The only way to remove a nit (without using a high-quality lice comb) is to squeeze it between two fingers or fingernails and then slide it down the entire hair strand, finally pulling it off the end. They are also are usually golden to dark brown or translucent in color, not white. This is sometimes tricky because they can appear white in dark hair. Lice eggs are about the size of a poppyseed and teardrop-shaped, not circular.
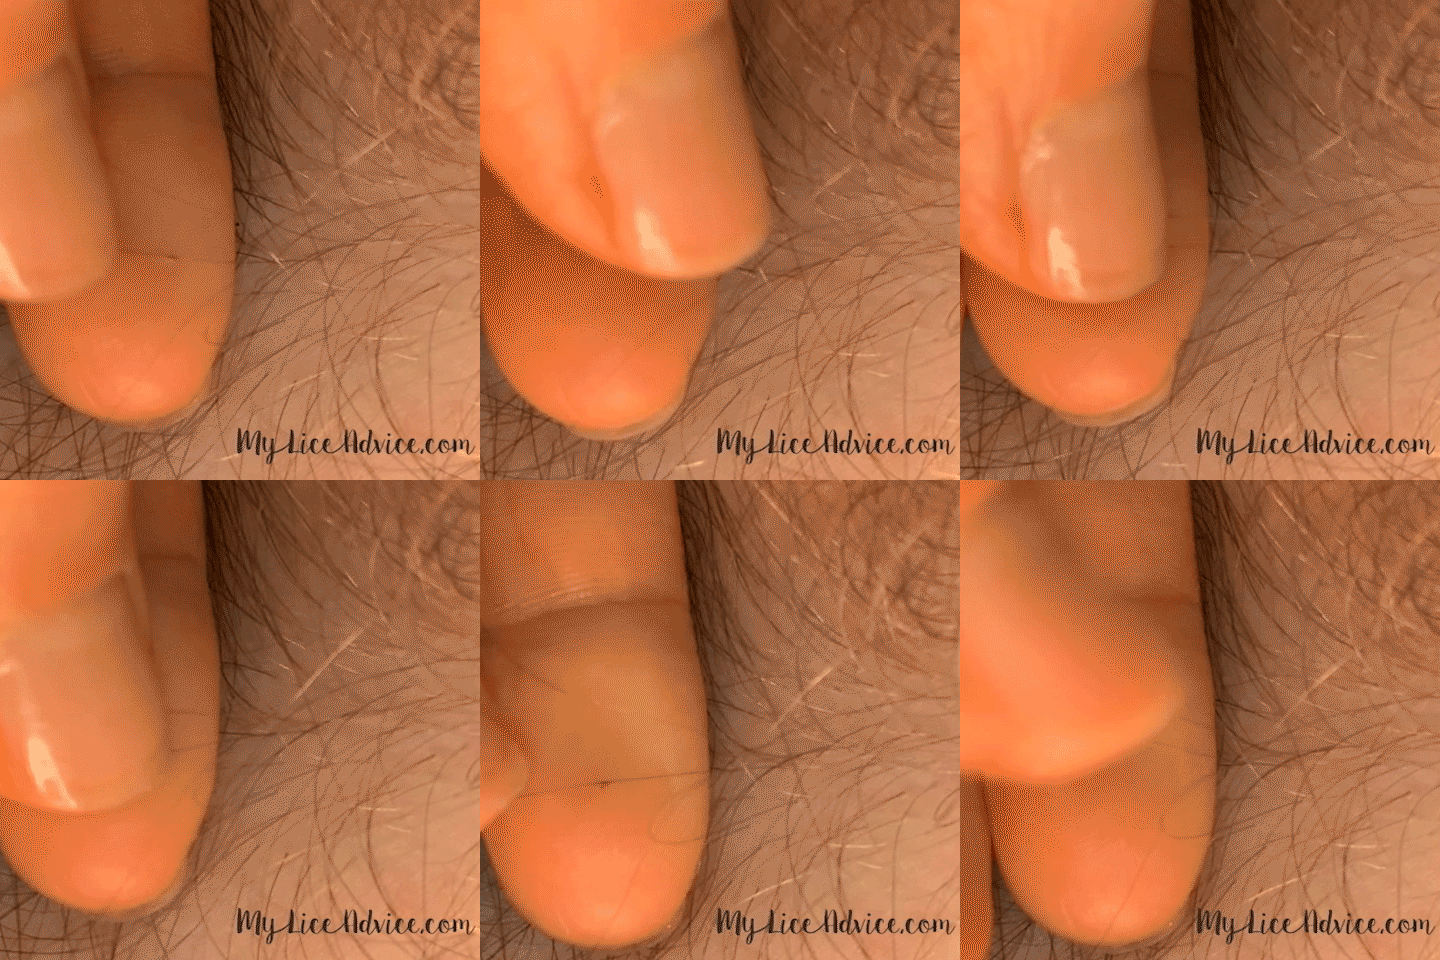
If you see something that seems suspicious, hold firmly to the section of hair you are examining and follow these steps to confidently determine if it is a nit.
Blow, Flick or Jostle.
If it “blows” away, then it is dandruff or some other debris. If it moves in any way at all, it is not a nit.
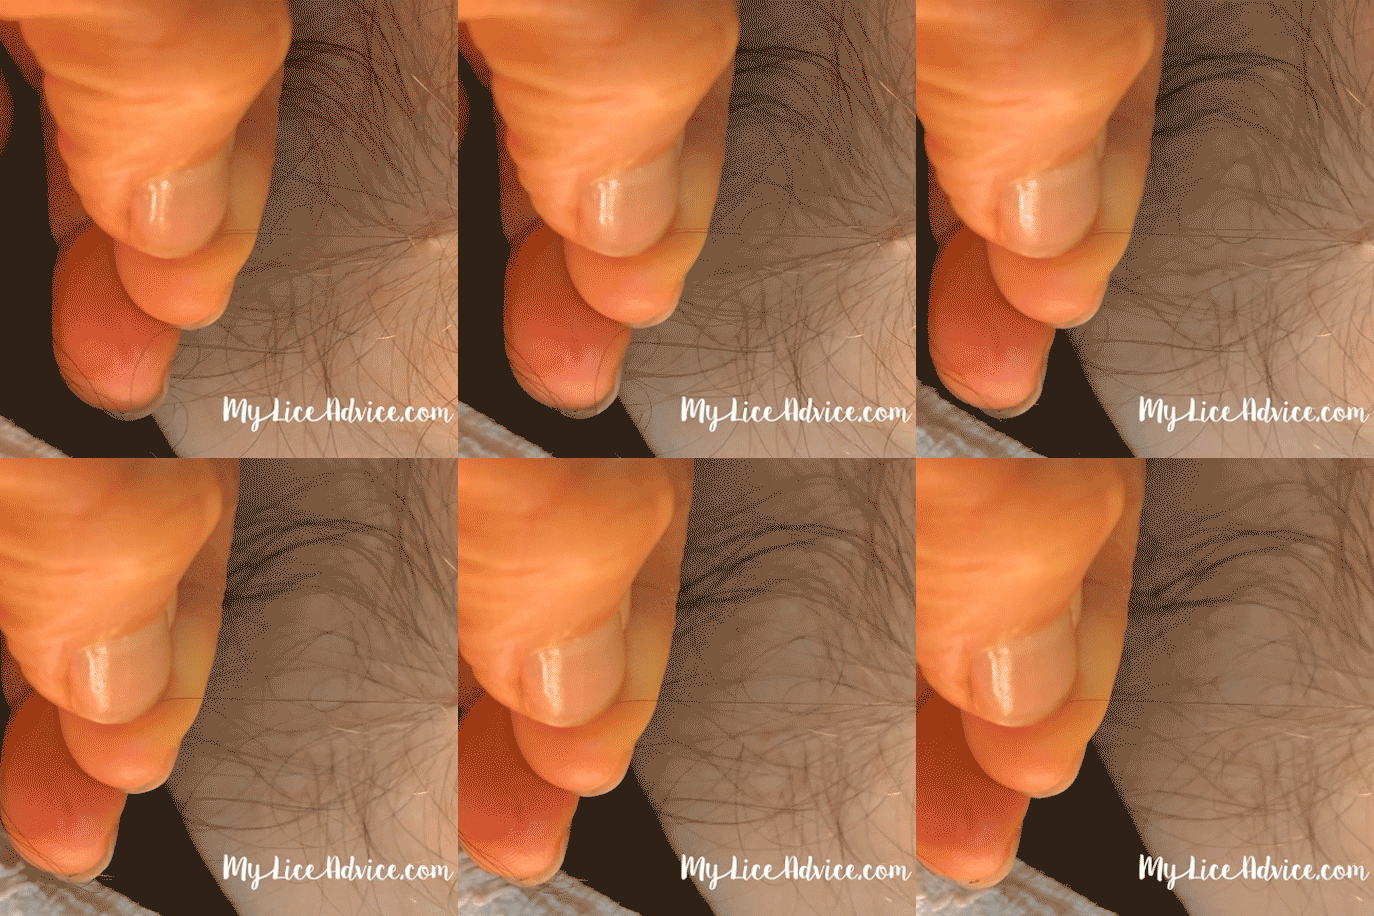
When in Doubt, Try to Pull it Out.
If the “nit in question” does not blow or flick away, then attempt to remove it from the hair strand. To do this, use your thumb and index finger to pull it down the hair strand. If it is a nit, it will be stuck on the hair strand and will require you to “tug” it down in this manner.
Examining Lice Eggs in Question
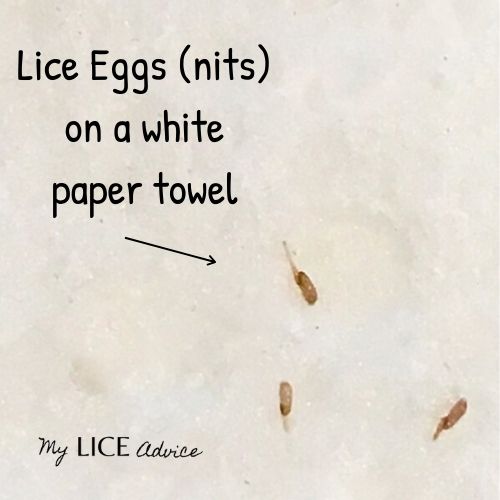
If you had difficulty removing the item from the hair, it felt stuck on the hair strand, and you had to pull it all the way down the hair strand to remove it, then unfortunately it is likely a nit. Examine it on your finger and then place it on a WHITE paper towel. Here is a picture of what nits look like against this background.
For more information about precisely what nits look like, check out our article, What Lice Eggs and Nits Look Like: Pictures of Lice Eggs in Hair.
If you find a nit, then your search is over. YES, your child has lice or at least had lice at one time. The only way to have nits in your hair is to have had an actual lice bug in your hair laying these eggs at one point in time. Gross, we know, but now you can start to get rid of these pesky things.
IF YOU DISCOVER LICE WHEN YOU'RE CHECKING...
Don't panic! Just go to the step-by-step video system, follow along with the video system and be done with lice by the end of the day!
Step #2: Pick A Place with Good Lighting
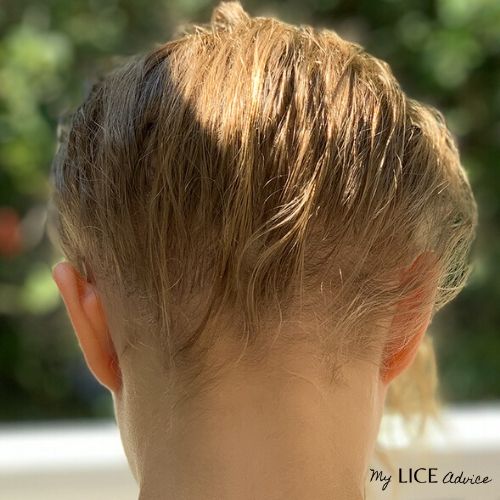
A good lice check starts with clean, dry hair and good lighting.
Bright lighting is essential when checking for lice eggs. The very best light to see nits in is natural daylight. If it is a clear, sunshiny day outside, then go out or next to a large window for your lice check.
If daylight isn’t available, then find the room that has the best artificial lighting. A bright lamp set up close to the head you’re examining will also work.
It's best to check for lice on clean dry hair. Debris and dandruff tends to get stuck on wet or oily hair making it harder to tell the difference between nits or something else in the hair.
Step #3: Don't Get Confused by Dandruff (Start with DRY HAIR)
A good lice check starts with clean, DRY HAIR
DRY HAIR. DRY HAIR. DRY HAIR.
Okay, I think I've emphasized DRY hair enough.
The reason why doing a lice check on DRY hair is so important is that if you check wet hair you're likely to confuse dandruff for lice eggs. Debris and dandruff tends to get stuck on wet or oily hair making it harder to tell the difference between nits or something else in the hair.
In dry hair, dandruff can be jostled easily, whereas lice eggs (nits) can not. Here's two videos comparing the two
This is Dandruff
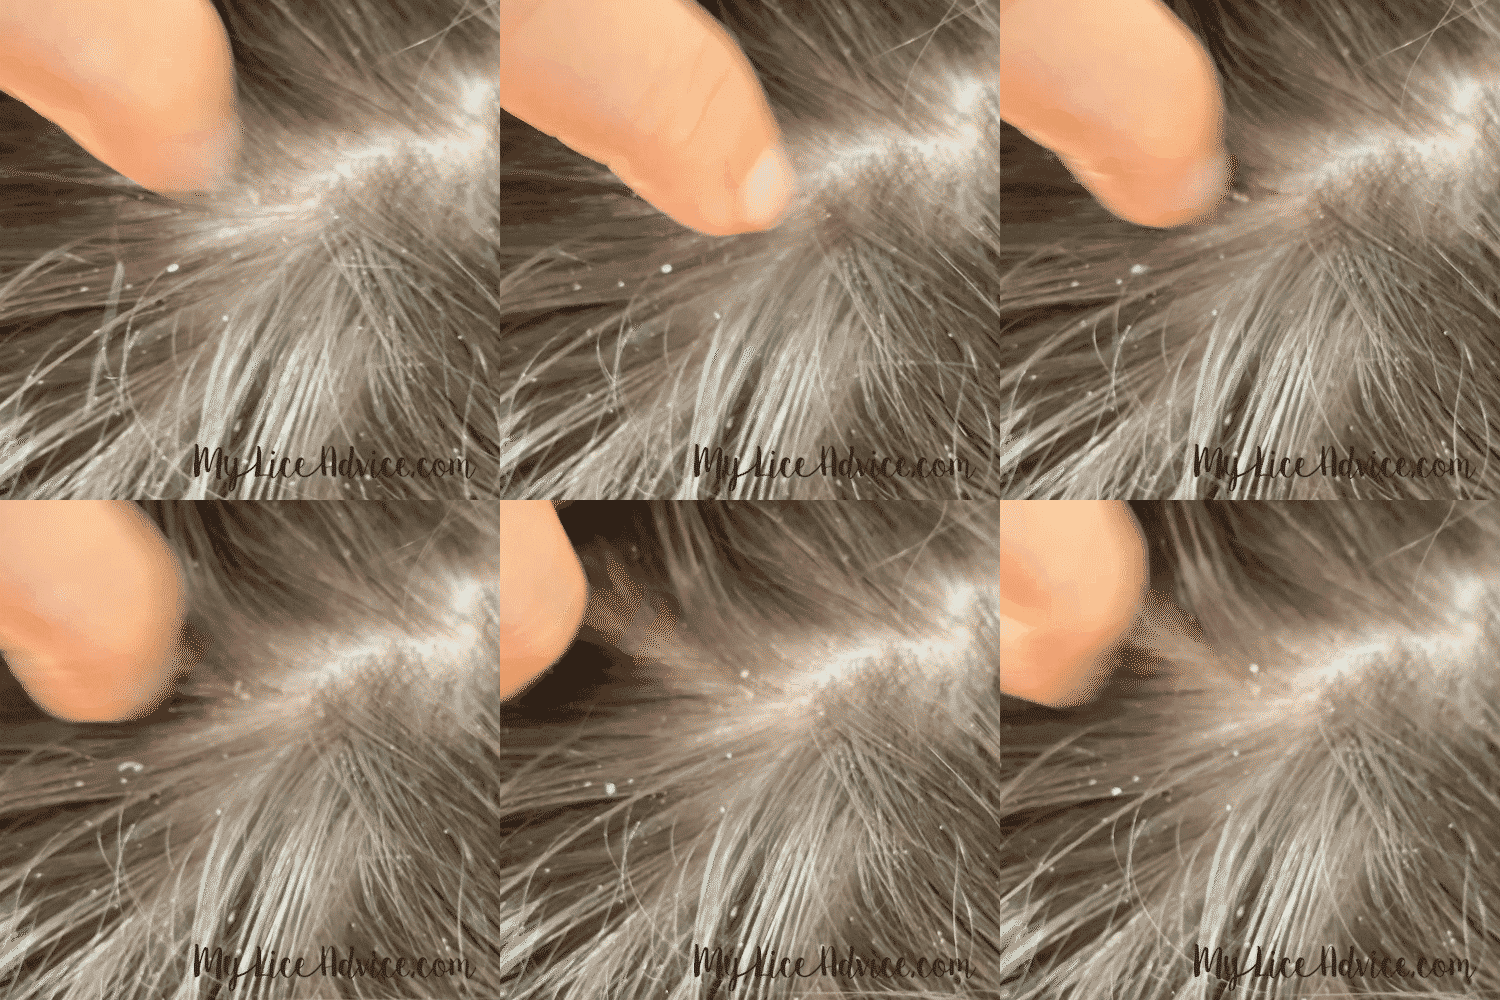
This is a Lice Egg (Nit)

These are just two of MANY pictures and videos comparing lice and dandruff on My Lice Advice. If you're looking for more help determining if what you're seeing is lice or dandruff check out my other article Lice vs Dandruff – 7 Key Differences Between Lice Eggs and Dandruff.
If you're not sure if you're finding lice or dandruff check out my other article Lice vs Dandruff – 7 Key Differences Between Lice Eggs and Dandruff.
Step #4: Check the "Hot Spots"
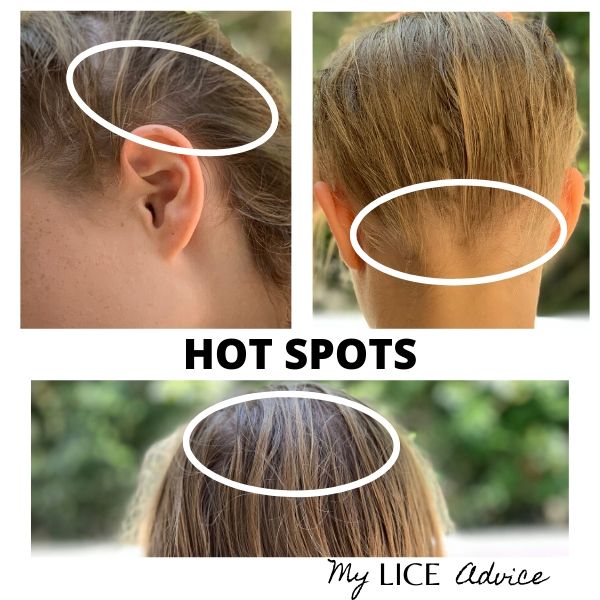
A Quick Note on Hot Spots
Focus your attention on the hair close to the scalp in the “hot spots”.
While lice lay nits throughout the entire head, there are a few places lice most love to lay eggs. These places, termed “hot spots,” are the ideal places to check for nits. These hot spots are behind the ears, the nape of the neck, and the crown of the head.
Hot Spot #1- Bangs (Hairline Near Forehead)
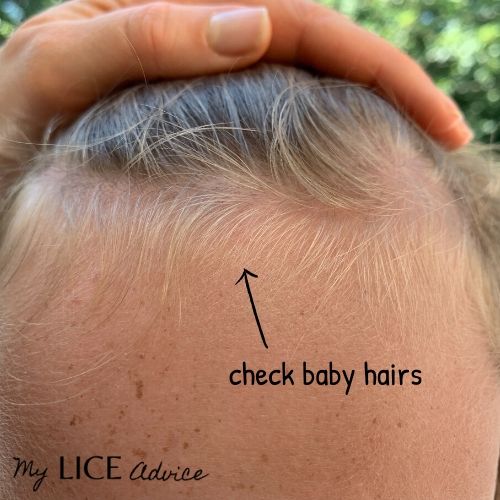
Begin checking for lice in the bang area.
Even though the bang area isn’t necessarily a “hot spot”, I like to begin lice checks here because it is the easiest area to check and those with very short hair (like boys) typically have the most hair in this area.
Comb all hair back from away from the face and check the baby hairs near the forehead for lice eggs as described above in the How To Examine Any “Nits in Question” section. For those with very short hair, you may need to clip the hair back like in this picture.
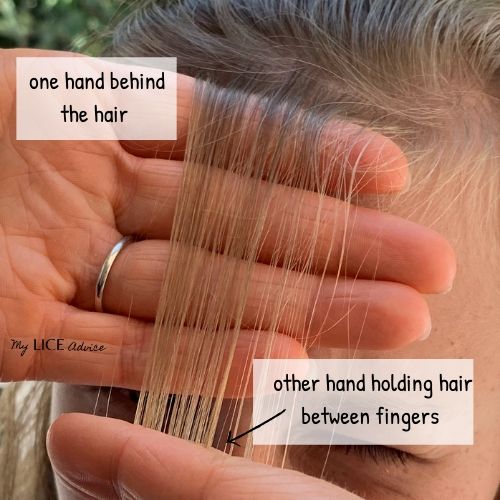
Beginning with the hair immediately at the hairline, separate a single thin layer section of the hair horizontally.
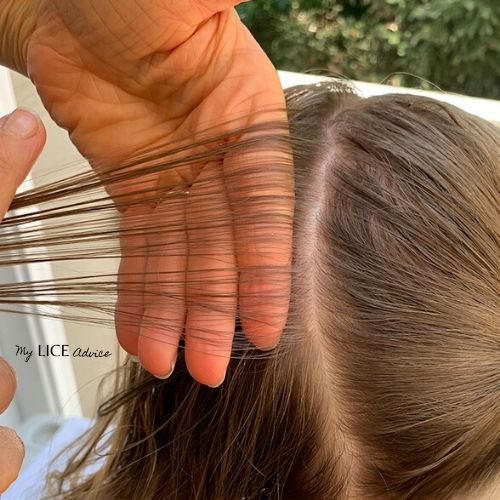
Use one hand to pull and hold the hair straight down and separate it from the rest. Hold the hair tightly between your index and ring fingers. Place your other hand behind the sectioned-off hair to give yourself an easier backdrop to check against.
Examine the section of hair for anything that looks unusual. Nits blend in well with hair, so using your hand as a contrasting background will help you to see them better.
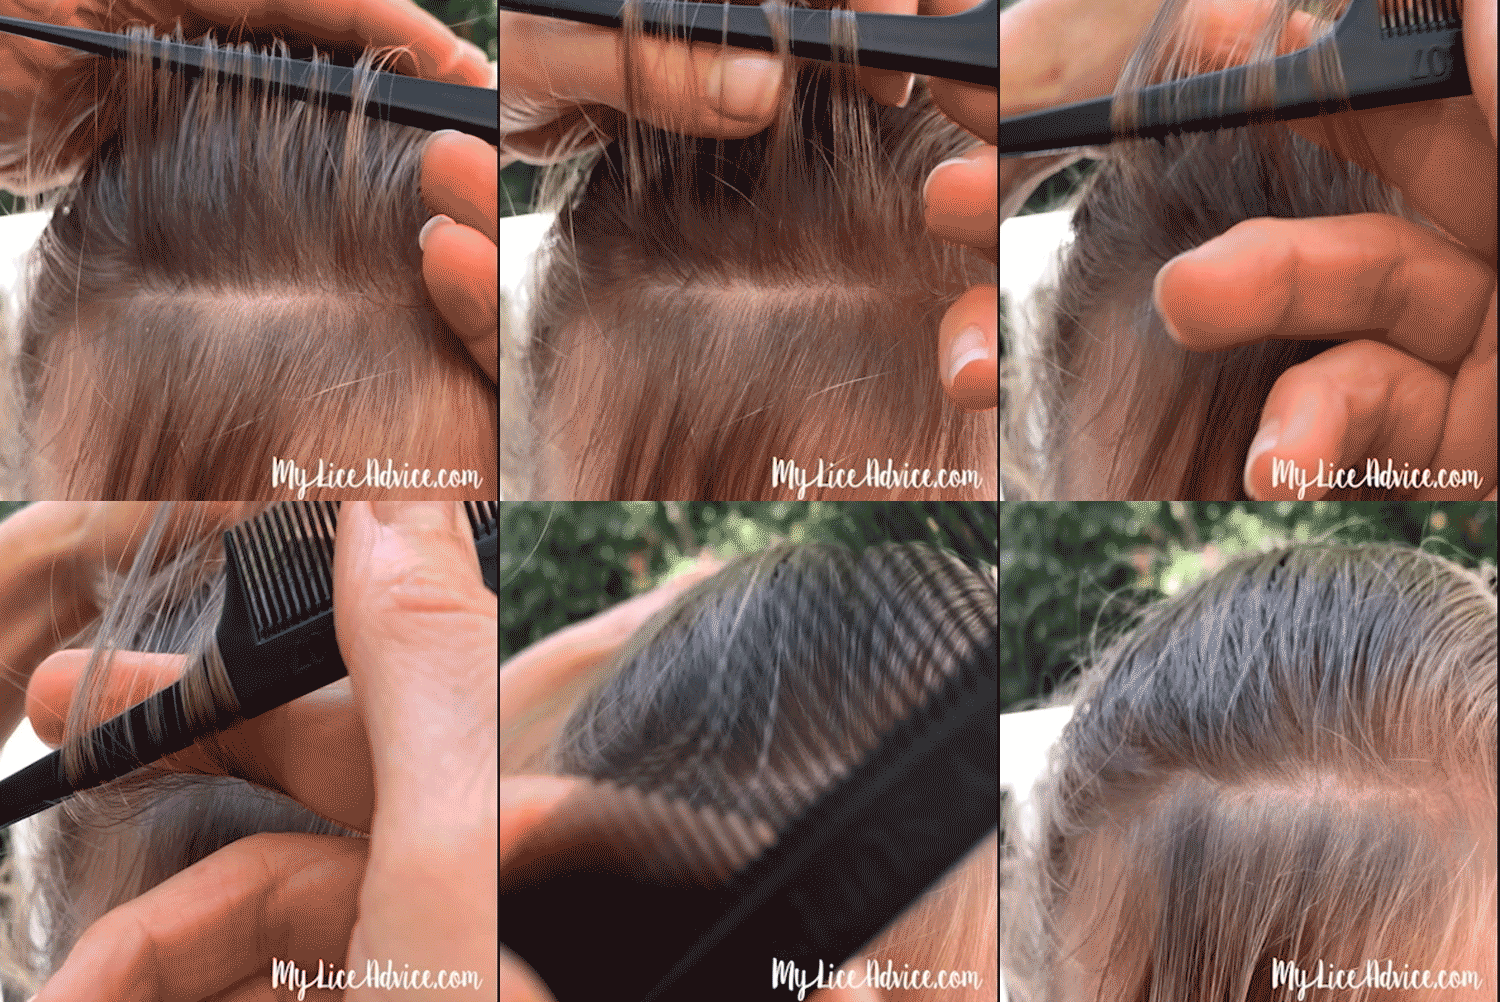
After you have examined a section of hair, let it drop down and then separate another small section of hair. Work your way towards the center of the head, until you have examined about ten thin sections of hair.
Hot Spot #2: Behind the Ears

Now it’s time for the first hot spot check: behind the ears.
For this area, it is easiest to check with the child’s head resting on a pillow.
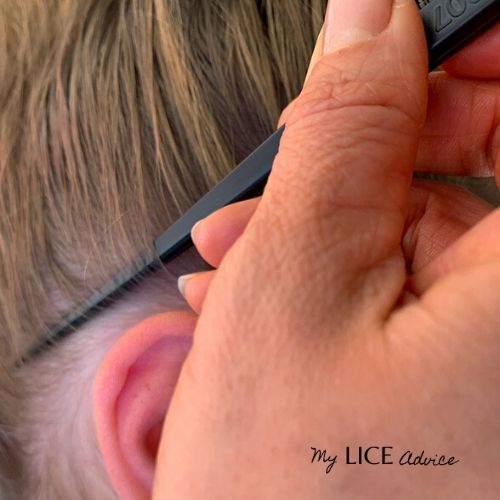
With your fine-toothed comb, comb the hair away from the ear you are checking.
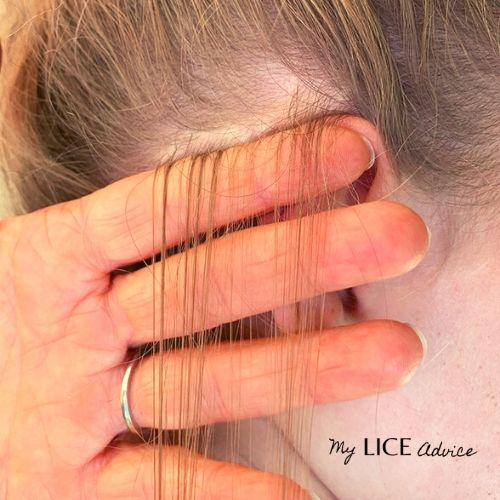
Beginning with the hair immediately behind the ear, separate a single thin layer section of the hair horizontally, in the same fashion as you did when examining the hairline. If necessary, clip hair so it stays out of the way.
As before, use one hand to pull the hair straight down and separate it from the other hair.
Place either your hand or a finger behind the section of the hair as seen below to ensure you have a contrasting background and don’t risk missing any nits that may be hiding in the hair.
Working your way towards the center of the head, examine at least ten thin sections of hair. Once you have reviewed all the sections behind one ear, have your child turn over on the pillow, head facing the opposite way, and examine behind the other ear using the same technique.
Hot Spot #3: Nape of the Neck
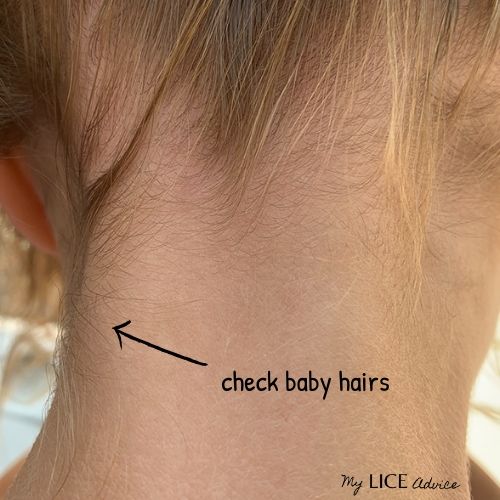
After you check for lice eggs behind the ears, it’s time for the next hot spot: the nape of the neck.
Have your child look down at their feet. Comb all of the hair away from the neck, up in a “high pony” or topknot fashion. If necessary, clip or wrap the hair in a ponytail holder so it stays out of the way.
Similar to the wisps at the forehead’s hairline, first check the baby hairs at the neck.Again take very thin sections of the hair and examine them as you did in the previous steps. Remember, use your hand as a backdrop so you don’t miss any nits blending in with the hair.
After examining at least ten sections behind the nape of the neck, you are ready to check the last hot spot--the very top of the head.
Hot Spot #4: Crown of the Head

Lastly, check the crown of the head for lice eggs.
To check the crown of the head, comb the hair into two pigtails, with the part straight down the middle of your child’s head. Either clip or hair tie the right side of the hair so it is out of the way.
Check the hair in vertical sections, beginning on the left side of the part. Gather a thin section of hair, as you’ve done with the previous areas, and examine it.
After examining a section of hair, move it to the other side of the part and clip it out of the way if needed. The part in the hair will shift slightly with each section you examine, helping you see how much you have already checked.
Examine at least five more vertical sections in this manner.
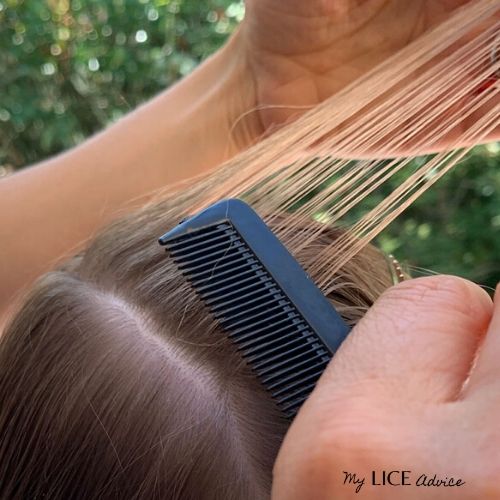
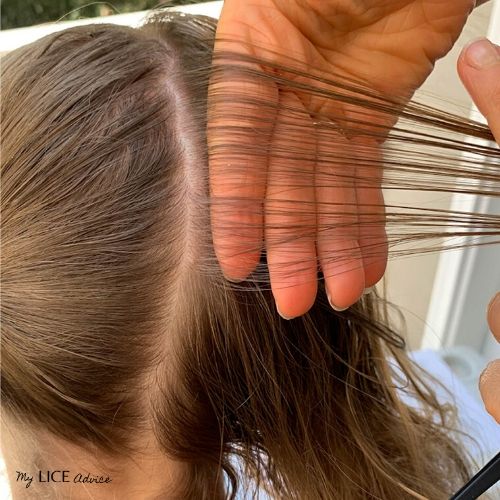
After you’ve examined the hair on the left side of the part, then switch to the right side. Put the left side into a ponytail holder and examine at least five vertical sections on the right side of the part in the same manner.
Step #5- Examine "Nits" in Question

First- Pull Out the "Nit" in Question
In order to pull a nit out of the hair you need to grip it between your index finger and your thumb, squeeze tight and pull it all the way down the hair strand.

Then Examine the Nit on a White Paper Towel
If you had difficulty removing something from the hair, it felt stuck on the hair strand, and you had to pull it all the way down the hair strand to remove it, then unfortunately it is likely a nit. Examine it on your finger and then place it on a WHITE paper towel. Here is a picture of what nits look like against this background.
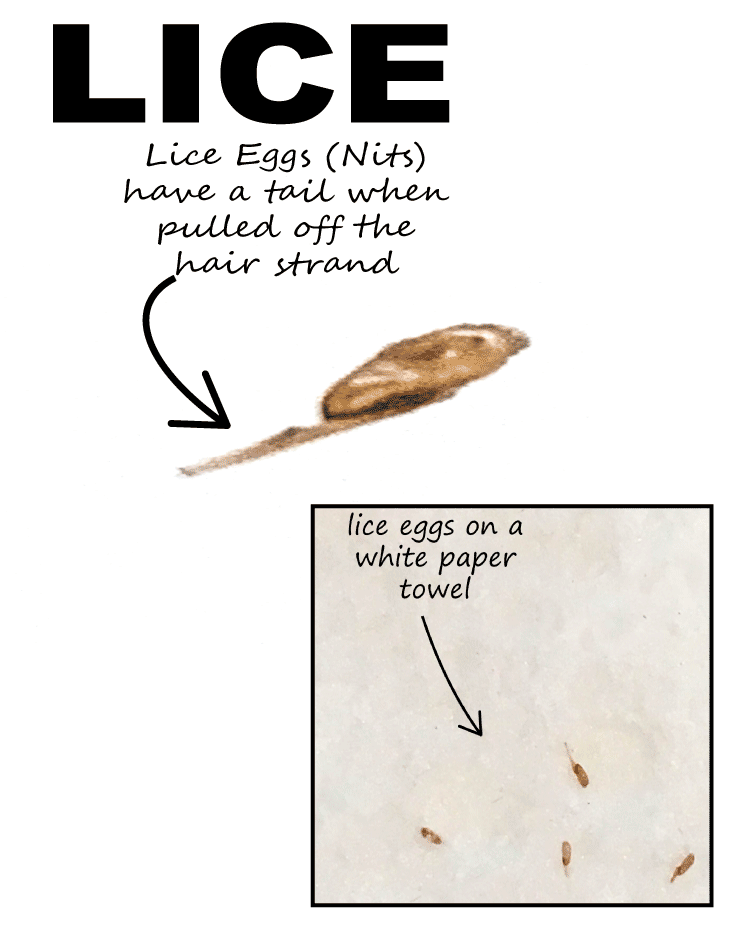
For more information about precisely what nits look like, check out our article, What Lice Eggs and Nits Look Like: Pictures of Lice Eggs in Hair.
If you find a nit, then your search is over. YES, your child has lice or at least had lice at one time. The only way to have nits in your hair is to have had an actual lice bug in your hair laying these eggs at one point in time. Gross, we know, but now you can start to get rid of these pesky things.
Why Is It So Hard to Get Rid of Lice?
Now that you know what you're looking for I want to talk briefly about your biggest worry (that your child actually has lice) and the question I get asked by parents around the world that have been battling lice….
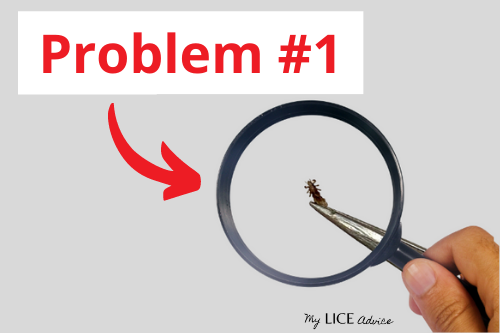
Parents around the world are all asking me the same question…. "Why is it so much harder to get rid of lice now?"
Lice have become immune to everything that used to work in the past. Perhaps you remember your mom using a typical lice treatment or mayonnaise and that doing the trick. The new strain of head lice is no longer killed by those treatments, that’s why lice today are termed by people, “super lice,” because they are immune to those treatments.
I’ve cured thousands of people of lice in my lice center and let me tell you, I don't do it with over-the-counter lice treatments.
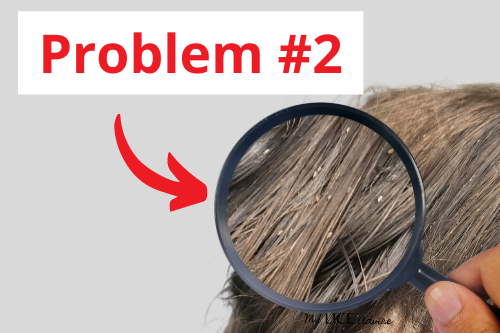
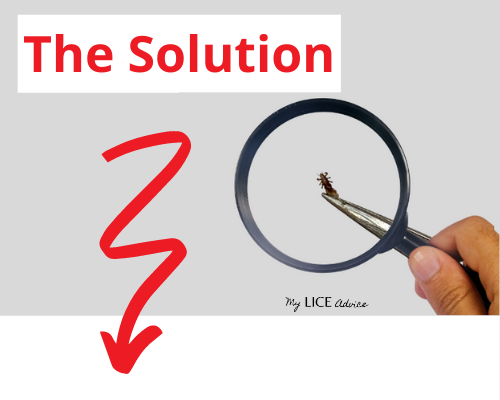
Most people struggle with lice because they focus all of their attention on killing lice bugs and not enough attention on GETTING RID OF LICE!
If you want to get rid of lice you have to address all 3 of the problems of lice:
- Lice Bugs
- Lice Eggs
- Getting Lice Back
The best way to get rid of lice is to tackle all 3 of these problems at the same time, which is what I teach in my step-by-step video system.
So, if you discover your child HAS lice, don't panic. Just head over to the video system. Follow along with the videos and you'll be done with lice by the end of the day.

How to be lice-free by the end of the day...

GET THE VIDEO SYSTEM
Get rid of lice the same way the experts do. Your personal lice coach walks you through each step of doing a professional lice treatment at home in a series of videos.

FOLLOW ALONG
Follow along with the videos on your child in your home. No lice kits or toxic chemicals involved!

BE DONE WITH LICE!
When you're done with the videos, you're done with lice. And it's gone permanently!
Lice or No Lice?
If you have checked all of the hot spots and found no nits or lice, then breathe a sigh of relief because you can confidently feel that your child does not have lice.
If you did find nits or full-grown lice during your lice check, then you are unfortunately dealing with an infestation. Don’t freak out, though! I am here to help you get rid of it without chemicals, retreatments, and weeks/months/years of frustration. Follow along with the step-by-step video system and you'll be done with lice by the end of the day.
All the best!


Theresa is a Registered Nurse and lice expert with years of experience curing children of lice. She owns a lice treatment center in the US which is where she perfected the Step-by-Step Video System proven to get rid of lice. She also works with government agencies and schools helping those with the worst head lice cases in America.
Her greatest passion is empowering parents by teaching parents online how to do a professional lice treatment on their child at home. She is the Lice Coach for the My Lice Advice Step-by-Step Video System.
